Suche nach Stichworten
Protecting your worksheet in an Excel file
Do you know how to protect your worksheet in an Excel file? Watch this to find out!
Protecting your worksheet in an Excel file
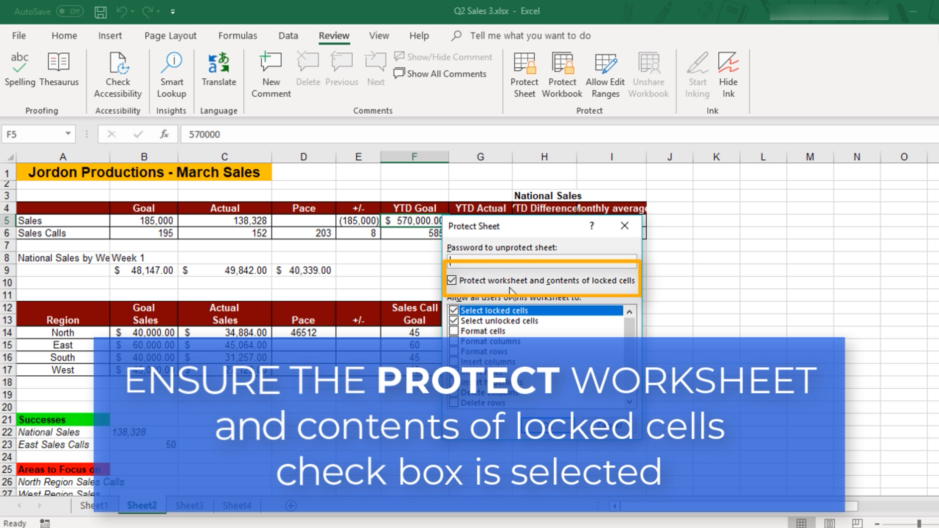
To protect your worksheet in an Excel file, select the Protect Sheet option in the Review ribbon. Make sure the Protect worksheet and lock cell contents option is checked, then click OK.
As a result, all cells in the worksheet will be locked so that no changes can be made to them. When you attempt to change the cell, a message like this will appear informing you that the sheet is protected.
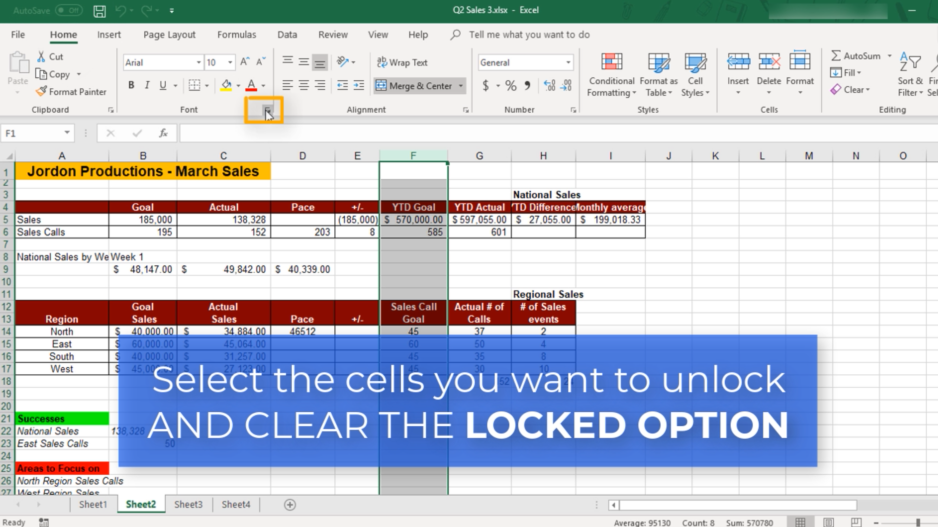
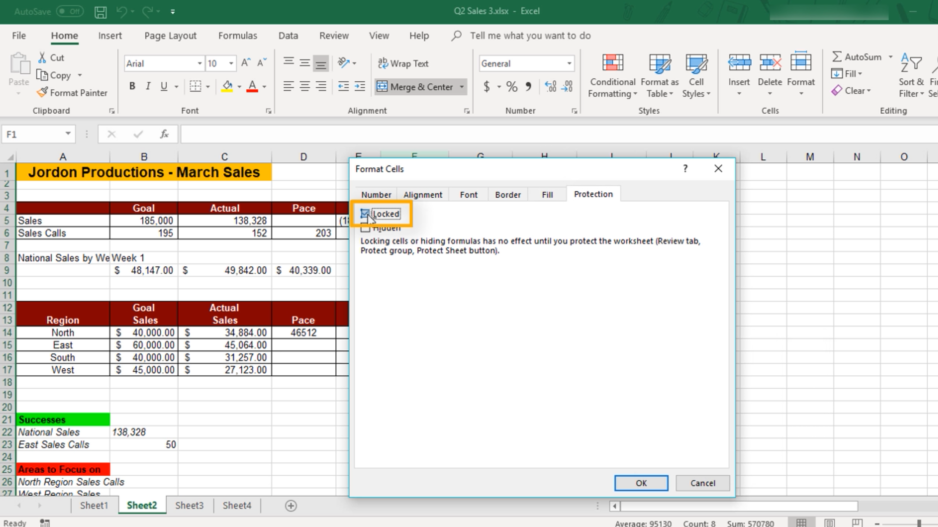
It is possible, however, to leave some of the cells unlocked allowing you to make changes while the rest of the cells remain locked and protected. To do this, unprotect the sheet first and after that select the cells you wish to unlock. Under the Home ribbon, select the Font Settings button. Under the Protection tab in the window which opens, uncheck the Locked check box and click OK. Then return to the Review tab and select Protect Sheet again and finally press OK. Now the selected cells’ contents can be changed while the rest of the cells stay locked and protected.