Suche nach Stichworten
Creating a contact group in Outlook
Do you know how to creating a contact group in Microsoft Outlook? Watch this to find out!
Creating a contact group in Outlook
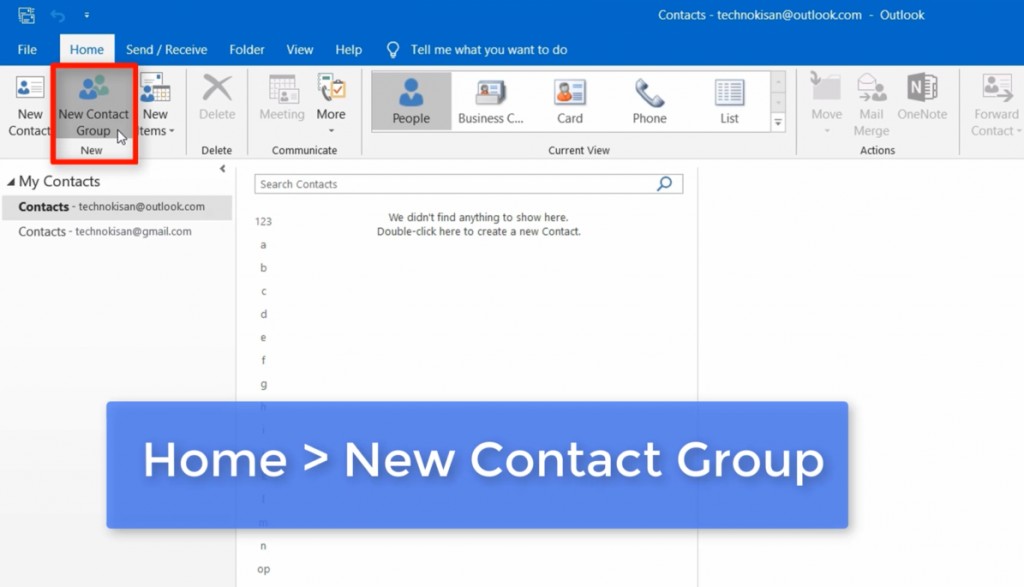
Rather than selecting multiple recipients for an e-mail message, it is possible to create a contact group that you can use over and over again. In Outlook 2016, navigate to the Contact section, click New Contact Group on the Home ribbon.
Specify a group name, and then just click Add Members.
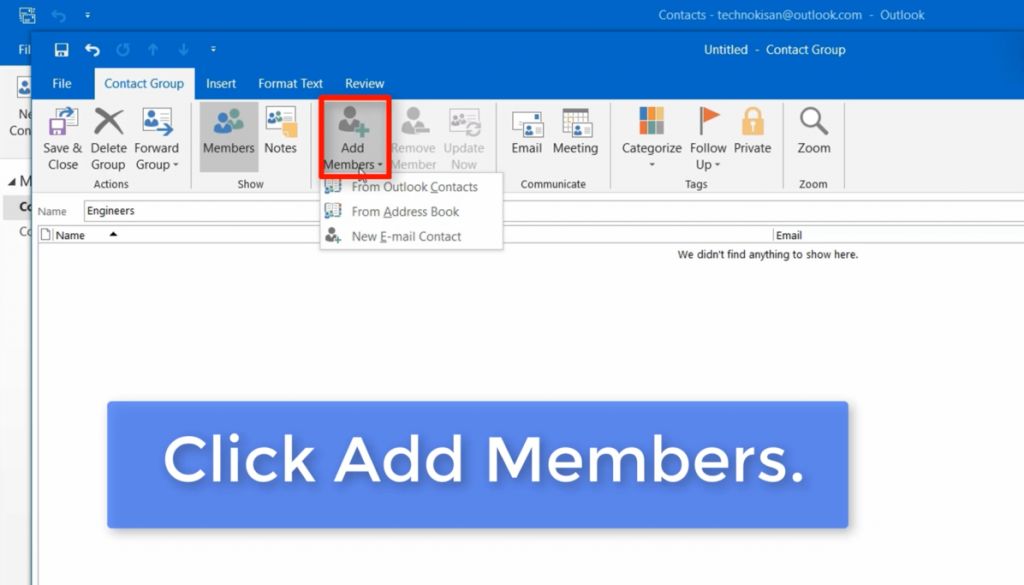
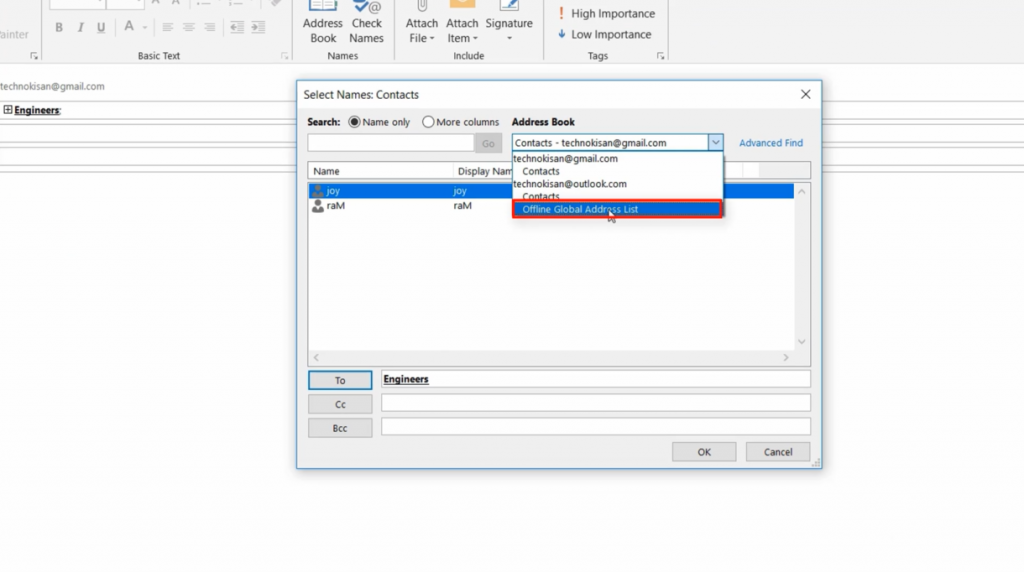
If you are already using an Office 365 account, you can choose whether you want to select members from your Outlook address book or the contacts that are synchronized with your Office 365 account.
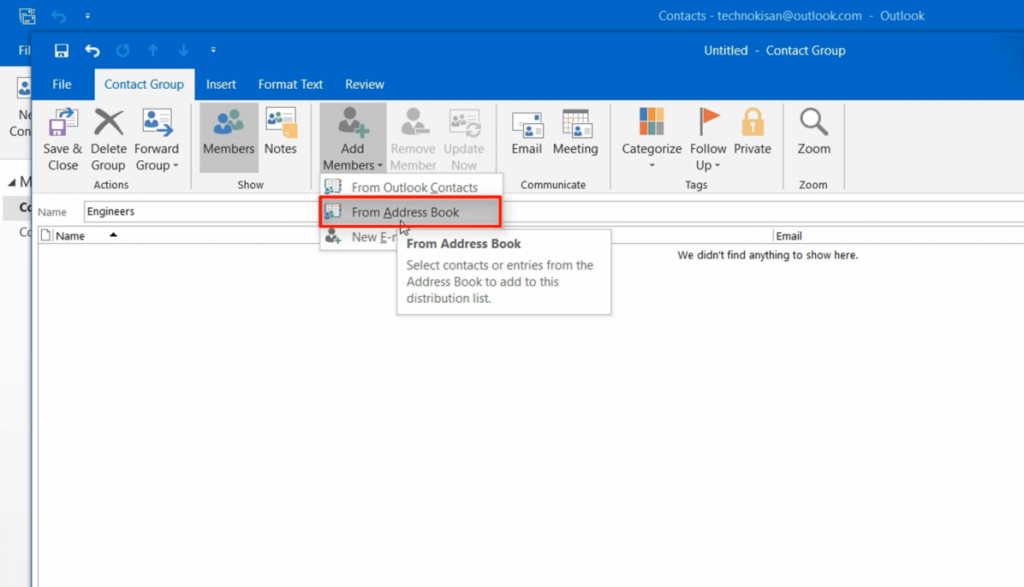
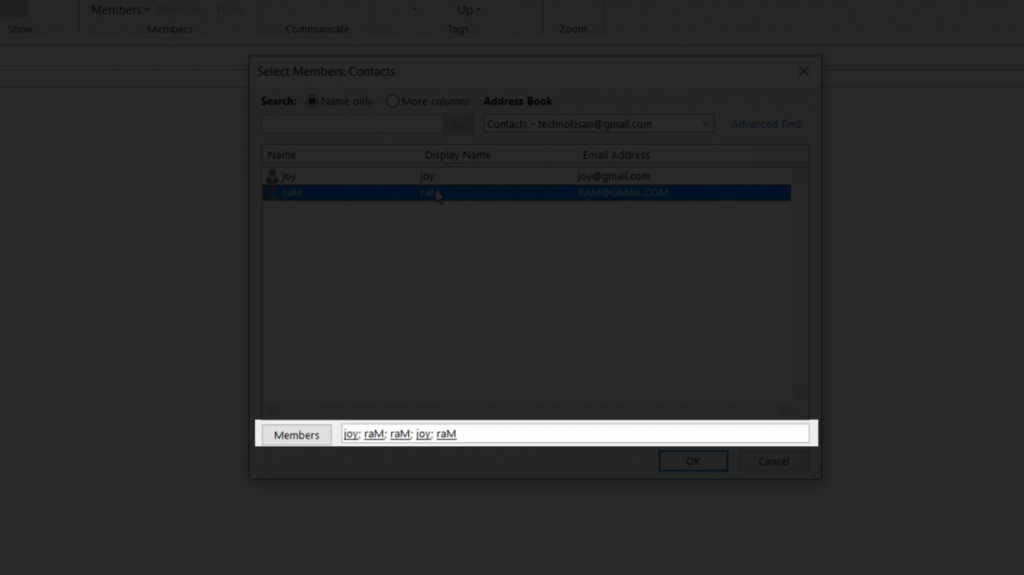
By simply double-clicking on the contact you want to add to the group, you will see them in the member’s field. Once you are finished, click OK, and then save and close.
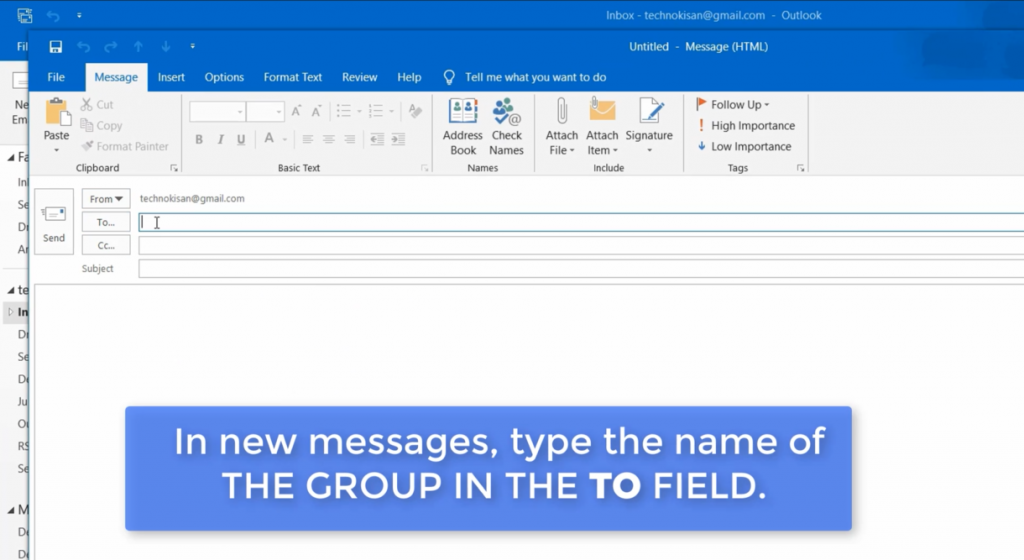
When you compose a new email message in the future – rather than entering the recipient’s email address – simply enter the name of the group.
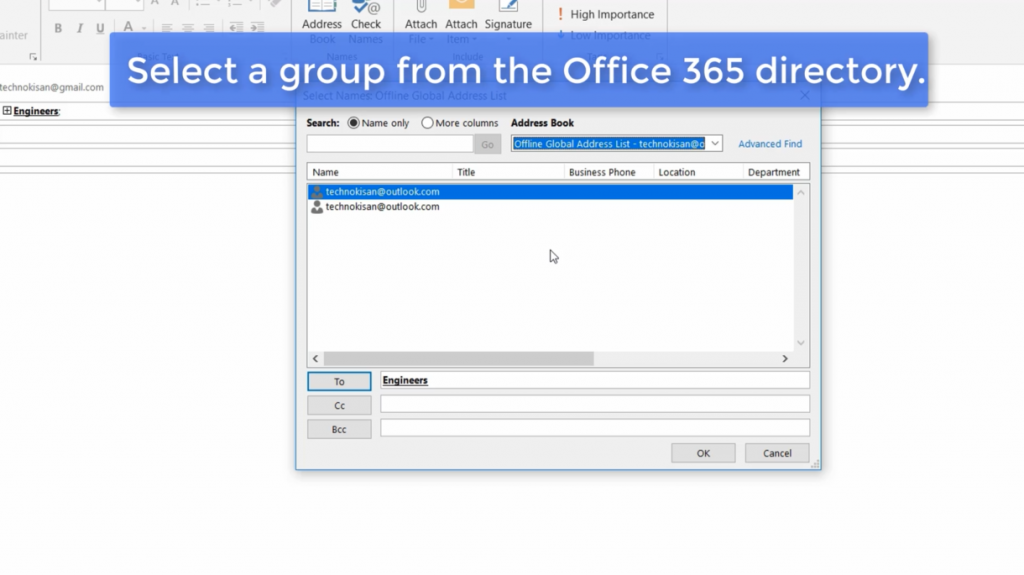
In addition, Office 365 business or enterprise users will be able to send messages to all existing Office 365 or SharePoint groups in the organization by simply clicking the two buttons, choosing the global address list for the Office 365 organization, then selecting an Office 365 group from that directory, double-clicking it to add it to the To field, and clicking OK.